
Flash Furniture Mellie 23.25″ Round Aluminum Indoor-Outdoor Bar Height Table with Flip-Up Table
61

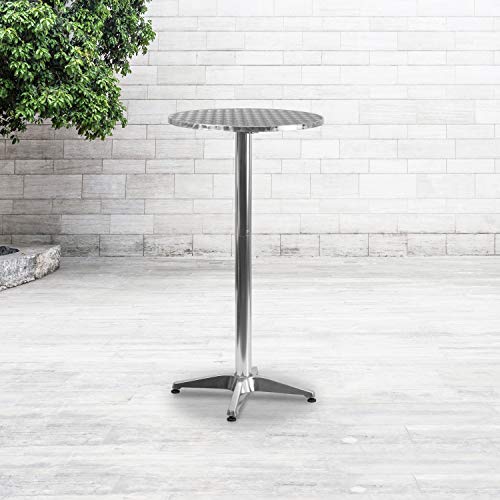
Product Images


Product Features
- 23.25" ROUND BAR HEIGHT COCKTAIL TABLE: Designed for indoor or outdoor commercial and residential use, this bar table is great for cocktail hour, hospitality facilities, banquet halls, and kitchens
- SEATS UP TO 2 ADULTS: Comfortably seats up to 2 adults and can be paired with 2 aluminum bar chairs, or guests can stand around the table with a drink while they wait to be seated
- FLIP-UP TABLETOP: With the simple touch of a button, the tabletop conveniently flips up for easy, compact storage after use
- HIGH-QUALITY CONSTRUCTION: Made with a smooth designer looking stainless steel top and lightweight aluminum base with protective plastic floor glides that allows you to transport the table with ease
- EFFICIENT SIZE: Round bar height table measures 23.25" W x 23.25" D x 45" H to provide plenty of space for food, drinks, activities, and more
Product Specifications
| Color | Aluminum |
| Shape | Round |
| Table Design | Dining Table |
| Style Name | Flip Top |
| Finish Types | Silver |
| Theme | unspecified |
| Furniture Finish | Stainless Steel |
| Leg Style | Arch |
| Top Color | Black |
| Handle Finish Type | Stainless Steel |
| Base Color | Black |
| Handle Color | Black |
| Required Assembly | Yes |
| Maximum Weight Recommendation | 130 Pounds |
| Recommended Uses For Product | Patio Bar Table |
| Indoor Outdoor Usage | Outdoor |
| Specific Uses For Product | Non Residential Use, Residential Use |
| Warranty Type | Limited |
| Frame Material Type | Aluminum |
| Top Material Type | Metal |
| Product Care Instructions | SW-Solvent and water based cleaner such as foam |
| Base | Aluminum |
| Is Stain Resistant | No |
| Material Type | Metal |
| Handle Material | Aluminum |
| Item Dimensions D x W x H | 23.25"D x 23.25"W x 45"H |
| Item Weight | 19 Pounds |
| Size | 23.25" Round |
| Item Dimensions | 23.25 x 23.25 x 45 inches |
| Tabletop Thickness | 0.88 Inches |
| Item Width | 23.25 Inches |
| Base To Top Distance | 45 Inches |
| Brand Name | Flash Furniture |
| Age Range Description | Adult |
| Model Name | Flash Furniture |
| Included Components | Aluminum Patio Bar Tables |
| Model Number | TLH-059A-GG |
| Item Width | 23.25 Inches |
| Global Trade Identification Number | 00889142005605 |
| Manufacturer | Flash Furniture |
| UPC | 889142005605 |
| Item Length | 23.25 Inches |
| Item Type Name | 23.25" Round Aluminum Indoor-Outdoor Bar Height Table with Flip-Up Table |
| Unit Count | 1.0 Count |
| Manufacturer Warranty Description | 1 year limited. |
| ASIN | B00ZADCROY |
| Seating Capacity | 2 |
| Base Type | Arch |
| Is Foldable | Yes |
| Number of Items | 1 |
| Frame Joint Type | Welded |
| Unextended Seating Capacity | 2 |
| Is Customizable | No |
| Is Electric | No |
Didn't find the right price? Set price alert below
Set Alert for Product: Flash Furniture 23.25" Round Aluminum Indoor/Outdoor Bar Height Table with Flip-Up Top, Heavy-Duty Aluminum Flip-Up Top Cocktail Table, Silver - $7,954.78

Product Price History
| Price history for Flash Furniture 23.25" Round Aluminum Indoor/Outdoor Bar Height Table with Flip-Up Top, Heavy-Duty Aluminum Flip-Up Top Cocktail Table, Silver | |
|---|---|
|
Latest updates:
|
|


This is a sturdy table with easy to adjust legs to make it. This is a sturdy table with easy to adjust legs to make it steady on uneven surfaces. It’s taller than many might want at 45 inches per my measurement. I can see why people who are used to step by step instructions with labeled parts would complain about the assembly but it’s actually quite easy to assemble if you read through the reviews and follow a few simple suggestions. Since there are so many complaints about the instructions, I’ve been meaning to write this review for some time but it’s been a while so I may not be perfect in the below suggestions.1. The nut and bolt which hold the base weight to the base for shipping purposes is just that – for shipping purposes. My memory is that it has no part in the assembly so add it to your collection or throw it away after you’ve finished assembly. Just make sure you’ve finished assembly before discarding it since the parts could have changed so I assembled mine.2. Make sure you have a good 17mm (that’s my memory) wrench and, if also available, socket wrench, to finish off tightening as the final step. That will give you a very sturdy table.3. It has very few parts, all of which can be identified by the photos, and the diagrams show where each part (and how many) go. It just takes a little study but not that much since there are so few parts.4. The best suggestion I read was to build upside down. Securely attach the the folding bracket to the table top, then attach the support rod to the bracket, then slide on the support tubes with the middle connector, then the base, then the base weight and then attach it all together with a washer, split washer and two nuts. Note that there is a notch in the bottom tube that fits into a slot in the base that keeps it from rotating. Securely attaching the folding bracket to the table top and then the two nuts to the bottom weight gives a very sturdy table. This is a really good place to use a socket wrench to make it quite tight.5. Note that the middle support rods are not totally screwed together or into the folding bracket or there won’t be enough threads left to attach the bottom weight. I didn’t realize that until the end of my first time through and had to remove the bottom legs and middle tubes to lengthen the support rods. That took all of an extra couple of minutes.As noted, the table is taller than many might want (45 inches per my measurement) and requires some pretty good engineering skills and the right tools to shorten. We ultimately decided it was too tall and, at the risk of the purchase price, I shortened it five inches, which made it a perfect height for us. I would not recommend doing that unless you’re really good at that sort of thing and have the right tools. Even with that, I got lucky and it worked out. The process included (i) removing half of the folding bracket to use as a large washer (the support tubes don’t fit flush against the table top so I used a portion of the folding bracket for that purpose), (ii) drilling out the folding bracket so the support rod could screw directly to the table top and (iii) shortening both the support rod and support tubes. Again, I don’t recommend trying this. If a 45 inch tall table is too tall for you, I suggest not buying this table. If that height works for you, then this is a great table for the price.
This is a sturdy table with easy to adjust legs to make it. This is a sturdy table with easy to adjust legs to make it steady on uneven surfaces. It’s taller than many might want at 45 inches per my measurement. I can see why people who are used to step by step instructions with labeled parts would complain about the assembly but it’s actually quite easy to assemble if you read through the reviews and follow a few simple suggestions. Since there are so many complaints about the instructions, I’ve been meaning to write this review for some time but it’s been a while so I may not be perfect in the below suggestions.1. The nut and bolt which hold the base weight to the base for shipping purposes is just that – for shipping purposes. My memory is that it has no part in the assembly so add it to your collection or throw it away after you’ve finished assembly. Just make sure you’ve finished assembly before discarding it since the parts could have changed so I assembled mine.2. Make sure you have a good 17mm (that’s my memory) wrench and, if also available, socket wrench, to finish off tightening as the final step. That will give you a very sturdy table.3. It has very few parts, all of which can be identified by the photos, and the diagrams show where each part (and how many) go. It just takes a little study but not that much since there are so few parts.4. The best suggestion I read was to build upside down. Securely attach the the folding bracket to the table top, then attach the support rod to the bracket, then slide on the support tubes with the middle connector, then the base, then the base weight and then attach it all together with a washer, split washer and two nuts. Note that there is a notch in the bottom tube that fits into a slot in the base that keeps it from rotating. Securely attaching the folding bracket to the table top and then the two nuts to the bottom weight gives a very sturdy table. This is a really good place to use a socket wrench to make it quite tight.5. Note that the middle support rods are not totally screwed together or into the folding bracket or there won’t be enough threads left to attach the bottom weight. I didn’t realize that until the end of my first time through and had to remove the bottom legs and middle tubes to lengthen the support rods. That took all of an extra couple of minutes.As noted, the table is taller than many might want (45 inches per my measurement) and requires some pretty good engineering skills and the right tools to shorten. We ultimately decided it was too tall and, at the risk of the purchase price, I shortened it five inches, which made it a perfect height for us. I would not recommend doing that unless you’re really good at that sort of thing and have the right tools. Even with that, I got lucky and it worked out. The process included (i) removing half of the folding bracket to use as a large washer (the support tubes don’t fit flush against the table top so I used a portion of the folding bracket for that purpose), (ii) drilling out the folding bracket so the support rod could screw directly to the table top and (iii) shortening both the support rod and support tubes. Again, I don’t recommend trying this. If a 45 inch tall table is too tall for you, I suggest not buying this table. If that height works for you, then this is a great table for the price.
This is a sturdy table with easy to adjust legs to make it. This is a sturdy table with easy to adjust legs to make it steady on uneven surfaces. It’s taller than many might want at 45 inches per my measurement. I can see why people who are used to step by step instructions with labeled parts would complain about the assembly but it’s actually quite easy to assemble if you read through the reviews and follow a few simple suggestions. Since there are so many complaints about the instructions, I’ve been meaning to write this review for some time but it’s been a while so I may not be perfect in the below suggestions.1. The nut and bolt which hold the base weight to the base for shipping purposes is just that – for shipping purposes. My memory is that it has no part in the assembly so add it to your collection or throw it away after you’ve finished assembly. Just make sure you’ve finished assembly before discarding it since the parts could have changed so I assembled mine.2. Make sure you have a good 17mm (that’s my memory) wrench and, if also available, socket wrench, to finish off tightening as the final step. That will give you a very sturdy table.3. It has very few parts, all of which can be identified by the photos, and the diagrams show where each part (and how many) go. It just takes a little study but not that much since there are so few parts.4. The best suggestion I read was to build upside down. Securely attach the the folding bracket to the table top, then attach the support rod to the bracket, then slide on the support tubes with the middle connector, then the base, then the base weight and then attach it all together with a washer, split washer and two nuts. Note that there is a notch in the bottom tube that fits into a slot in the base that keeps it from rotating. Securely attaching the folding bracket to the table top and then the two nuts to the bottom weight gives a very sturdy table. This is a really good place to use a socket wrench to make it quite tight.5. Note that the middle support rods are not totally screwed together or into the folding bracket or there won’t be enough threads left to attach the bottom weight. I didn’t realize that until the end of my first time through and had to remove the bottom legs and middle tubes to lengthen the support rods. That took all of an extra couple of minutes.As noted, the table is taller than many might want (45 inches per my measurement) and requires some pretty good engineering skills and the right tools to shorten. We ultimately decided it was too tall and, at the risk of the purchase price, I shortened it five inches, which made it a perfect height for us. I would not recommend doing that unless you’re really good at that sort of thing and have the right tools. Even with that, I got lucky and it worked out. The process included (i) removing half of the folding bracket to use as a large washer (the support tubes don’t fit flush against the table top so I used a portion of the folding bracket for that purpose), (ii) drilling out the folding bracket so the support rod could screw directly to the table top and (iii) shortening both the support rod and support tubes. Again, I don’t recommend trying this. If a 45 inch tall table is too tall for you, I suggest not buying this table. If that height works for you, then this is a great table for the price.
This is a sturdy table with easy to adjust legs to make it. This is a sturdy table with easy to adjust legs to make it steady on uneven surfaces. It’s taller than many might want at 45 inches per my measurement. I can see why people who are used to step by step instructions with labeled parts would complain about the assembly but it’s actually quite easy to assemble if you read through the reviews and follow a few simple suggestions. Since there are so many complaints about the instructions, I’ve been meaning to write this review for some time but it’s been a while so I may not be perfect in the below suggestions.1. The nut and bolt which hold the base weight to the base for shipping purposes is just that – for shipping purposes. My memory is that it has no part in the assembly so add it to your collection or throw it away after you’ve finished assembly. Just make sure you’ve finished assembly before discarding it since the parts could have changed so I assembled mine.2. Make sure you have a good 17mm (that’s my memory) wrench and, if also available, socket wrench, to finish off tightening as the final step. That will give you a very sturdy table.3. It has very few parts, all of which can be identified by the photos, and the diagrams show where each part (and how many) go. It just takes a little study but not that much since there are so few parts.4. The best suggestion I read was to build upside down. Securely attach the the folding bracket to the table top, then attach the support rod to the bracket, then slide on the support tubes with the middle connector, then the base, then the base weight and then attach it all together with a washer, split washer and two nuts. Note that there is a notch in the bottom tube that fits into a slot in the base that keeps it from rotating. Securely attaching the folding bracket to the table top and then the two nuts to the bottom weight gives a very sturdy table. This is a really good place to use a socket wrench to make it quite tight.5. Note that the middle support rods are not totally screwed together or into the folding bracket or there won’t be enough threads left to attach the bottom weight. I didn’t realize that until the end of my first time through and had to remove the bottom legs and middle tubes to lengthen the support rods. That took all of an extra couple of minutes.As noted, the table is taller than many might want (45 inches per my measurement) and requires some pretty good engineering skills and the right tools to shorten. We ultimately decided it was too tall and, at the risk of the purchase price, I shortened it five inches, which made it a perfect height for us. I would not recommend doing that unless you’re really good at that sort of thing and have the right tools. Even with that, I got lucky and it worked out. The process included (i) removing half of the folding bracket to use as a large washer (the support tubes don’t fit flush against the table top so I used a portion of the folding bracket for that purpose), (ii) drilling out the folding bracket so the support rod could screw directly to the table top and (iii) shortening both the support rod and support tubes. Again, I don’t recommend trying this. If a 45 inch tall table is too tall for you, I suggest not buying this table. If that height works for you, then this is a great table for the price.
This is a sturdy table with easy to adjust legs to make it. This is a sturdy table with easy to adjust legs to make it steady on uneven surfaces. It’s taller than many might want at 45 inches per my measurement. I can see why people who are used to step by step instructions with labeled parts would complain about the assembly but it’s actually quite easy to assemble if you read through the reviews and follow a few simple suggestions. Since there are so many complaints about the instructions, I’ve been meaning to write this review for some time but it’s been a while so I may not be perfect in the below suggestions.1. The nut and bolt which hold the base weight to the base for shipping purposes is just that – for shipping purposes. My memory is that it has no part in the assembly so add it to your collection or throw it away after you’ve finished assembly. Just make sure you’ve finished assembly before discarding it since the parts could have changed so I assembled mine.2. Make sure you have a good 17mm (that’s my memory) wrench and, if also available, socket wrench, to finish off tightening as the final step. That will give you a very sturdy table.3. It has very few parts, all of which can be identified by the photos, and the diagrams show where each part (and how many) go. It just takes a little study but not that much since there are so few parts.4. The best suggestion I read was to build upside down. Securely attach the the folding bracket to the table top, then attach the support rod to the bracket, then slide on the support tubes with the middle connector, then the base, then the base weight and then attach it all together with a washer, split washer and two nuts. Note that there is a notch in the bottom tube that fits into a slot in the base that keeps it from rotating. Securely attaching the folding bracket to the table top and then the two nuts to the bottom weight gives a very sturdy table. This is a really good place to use a socket wrench to make it quite tight.5. Note that the middle support rods are not totally screwed together or into the folding bracket or there won’t be enough threads left to attach the bottom weight. I didn’t realize that until the end of my first time through and had to remove the bottom legs and middle tubes to lengthen the support rods. That took all of an extra couple of minutes.As noted, the table is taller than many might want (45 inches per my measurement) and requires some pretty good engineering skills and the right tools to shorten. We ultimately decided it was too tall and, at the risk of the purchase price, I shortened it five inches, which made it a perfect height for us. I would not recommend doing that unless you’re really good at that sort of thing and have the right tools. Even with that, I got lucky and it worked out. The process included (i) removing half of the folding bracket to use as a large washer (the support tubes don’t fit flush against the table top so I used a portion of the folding bracket for that purpose), (ii) drilling out the folding bracket so the support rod could screw directly to the table top and (iii) shortening both the support rod and support tubes. Again, I don’t recommend trying this. If a 45 inch tall table is too tall for you, I suggest not buying this table. If that height works for you, then this is a great table for the price.
This is a sturdy table with easy to adjust legs to make it. This is a sturdy table with easy to adjust legs to make it steady on uneven surfaces. It’s taller than many might want at 45 inches per my measurement. I can see why people who are used to step by step instructions with labeled parts would complain about the assembly but it’s actually quite easy to assemble if you read through the reviews and follow a few simple suggestions. Since there are so many complaints about the instructions, I’ve been meaning to write this review for some time but it’s been a while so I may not be perfect in the below suggestions.1. The nut and bolt which hold the base weight to the base for shipping purposes is just that – for shipping purposes. My memory is that it has no part in the assembly so add it to your collection or throw it away after you’ve finished assembly. Just make sure you’ve finished assembly before discarding it since the parts could have changed so I assembled mine.2. Make sure you have a good 17mm (that’s my memory) wrench and, if also available, socket wrench, to finish off tightening as the final step. That will give you a very sturdy table.3. It has very few parts, all of which can be identified by the photos, and the diagrams show where each part (and how many) go. It just takes a little study but not that much since there are so few parts.4. The best suggestion I read was to build upside down. Securely attach the the folding bracket to the table top, then attach the support rod to the bracket, then slide on the support tubes with the middle connector, then the base, then the base weight and then attach it all together with a washer, split washer and two nuts. Note that there is a notch in the bottom tube that fits into a slot in the base that keeps it from rotating. Securely attaching the folding bracket to the table top and then the two nuts to the bottom weight gives a very sturdy table. This is a really good place to use a socket wrench to make it quite tight.5. Note that the middle support rods are not totally screwed together or into the folding bracket or there won’t be enough threads left to attach the bottom weight. I didn’t realize that until the end of my first time through and had to remove the bottom legs and middle tubes to lengthen the support rods. That took all of an extra couple of minutes.As noted, the table is taller than many might want (45 inches per my measurement) and requires some pretty good engineering skills and the right tools to shorten. We ultimately decided it was too tall and, at the risk of the purchase price, I shortened it five inches, which made it a perfect height for us. I would not recommend doing that unless you’re really good at that sort of thing and have the right tools. Even with that, I got lucky and it worked out. The process included (i) removing half of the folding bracket to use as a large washer (the support tubes don’t fit flush against the table top so I used a portion of the folding bracket for that purpose), (ii) drilling out the folding bracket so the support rod could screw directly to the table top and (iii) shortening both the support rod and support tubes. Again, I don’t recommend trying this. If a 45 inch tall table is too tall for you, I suggest not buying this table. If that height works for you, then this is a great table for the price.
This is a sturdy table with easy to adjust legs to make it. This is a sturdy table with easy to adjust legs to make it steady on uneven surfaces. It’s taller than many might want at 45 inches per my measurement. I can see why people who are used to step by step instructions with labeled parts would complain about the assembly but it’s actually quite easy to assemble if you read through the reviews and follow a few simple suggestions. Since there are so many complaints about the instructions, I’ve been meaning to write this review for some time but it’s been a while so I may not be perfect in the below suggestions.1. The nut and bolt which hold the base weight to the base for shipping purposes is just that – for shipping purposes. My memory is that it has no part in the assembly so add it to your collection or throw it away after you’ve finished assembly. Just make sure you’ve finished assembly before discarding it since the parts could have changed so I assembled mine.2. Make sure you have a good 17mm (that’s my memory) wrench and, if also available, socket wrench, to finish off tightening as the final step. That will give you a very sturdy table.3. It has very few parts, all of which can be identified by the photos, and the diagrams show where each part (and how many) go. It just takes a little study but not that much since there are so few parts.4. The best suggestion I read was to build upside down. Securely attach the the folding bracket to the table top, then attach the support rod to the bracket, then slide on the support tubes with the middle connector, then the base, then the base weight and then attach it all together with a washer, split washer and two nuts. Note that there is a notch in the bottom tube that fits into a slot in the base that keeps it from rotating. Securely attaching the folding bracket to the table top and then the two nuts to the bottom weight gives a very sturdy table. This is a really good place to use a socket wrench to make it quite tight.5. Note that the middle support rods are not totally screwed together or into the folding bracket or there won’t be enough threads left to attach the bottom weight. I didn’t realize that until the end of my first time through and had to remove the bottom legs and middle tubes to lengthen the support rods. That took all of an extra couple of minutes.As noted, the table is taller than many might want (45 inches per my measurement) and requires some pretty good engineering skills and the right tools to shorten. We ultimately decided it was too tall and, at the risk of the purchase price, I shortened it five inches, which made it a perfect height for us. I would not recommend doing that unless you’re really good at that sort of thing and have the right tools. Even with that, I got lucky and it worked out. The process included (i) removing half of the folding bracket to use as a large washer (the support tubes don’t fit flush against the table top so I used a portion of the folding bracket for that purpose), (ii) drilling out the folding bracket so the support rod could screw directly to the table top and (iii) shortening both the support rod and support tubes. Again, I don’t recommend trying this. If a 45 inch tall table is too tall for you, I suggest not buying this table. If that height works for you, then this is a great table for the price.
This is a sturdy table with easy to adjust legs to make it. This is a sturdy table with easy to adjust legs to make it steady on uneven surfaces. It’s taller than many might want at 45 inches per my measurement. I can see why people who are used to step by step instructions with labeled parts would complain about the assembly but it’s actually quite easy to assemble if you read through the reviews and follow a few simple suggestions. Since there are so many complaints about the instructions, I’ve been meaning to write this review for some time but it’s been a while so I may not be perfect in the below suggestions.1. The nut and bolt which hold the base weight to the base for shipping purposes is just that – for shipping purposes. My memory is that it has no part in the assembly so add it to your collection or throw it away after you’ve finished assembly. Just make sure you’ve finished assembly before discarding it since the parts could have changed so I assembled mine.2. Make sure you have a good 17mm (that’s my memory) wrench and, if also available, socket wrench, to finish off tightening as the final step. That will give you a very sturdy table.3. It has very few parts, all of which can be identified by the photos, and the diagrams show where each part (and how many) go. It just takes a little study but not that much since there are so few parts.4. The best suggestion I read was to build upside down. Securely attach the the folding bracket to the table top, then attach the support rod to the bracket, then slide on the support tubes with the middle connector, then the base, then the base weight and then attach it all together with a washer, split washer and two nuts. Note that there is a notch in the bottom tube that fits into a slot in the base that keeps it from rotating. Securely attaching the folding bracket to the table top and then the two nuts to the bottom weight gives a very sturdy table. This is a really good place to use a socket wrench to make it quite tight.5. Note that the middle support rods are not totally screwed together or into the folding bracket or there won’t be enough threads left to attach the bottom weight. I didn’t realize that until the end of my first time through and had to remove the bottom legs and middle tubes to lengthen the support rods. That took all of an extra couple of minutes.As noted, the table is taller than many might want (45 inches per my measurement) and requires some pretty good engineering skills and the right tools to shorten. We ultimately decided it was too tall and, at the risk of the purchase price, I shortened it five inches, which made it a perfect height for us. I would not recommend doing that unless you’re really good at that sort of thing and have the right tools. Even with that, I got lucky and it worked out. The process included (i) removing half of the folding bracket to use as a large washer (the support tubes don’t fit flush against the table top so I used a portion of the folding bracket for that purpose), (ii) drilling out the folding bracket so the support rod could screw directly to the table top and (iii) shortening both the support rod and support tubes. Again, I don’t recommend trying this. If a 45 inch tall table is too tall for you, I suggest not buying this table. If that height works for you, then this is a great table for the price.
I was genuinely surprised at the quality of this table. I bought it for my hotel its got a great chrome decorative finished top and sides. The base is sturdy and it flips up for easy storage. I am going to buy more now that I know the quality far out ways the price.
I was genuinely surprised at the quality of this table. I bought it for my hotel its got a great chrome decorative finished top and sides. The base is sturdy and it flips up for easy storage. I am going to buy more now that I know the quality far out ways the price.
Beware assembly! There are issues. Very sturdy in the end, and looks nice and solid, with fairly substantial construction. We are not talking highquality here – just solid enough and good-looking enough to be out for art gallery opening receptions: so that’s pretty good I would say.But every buyer should take note about a few things in assembly. I was fortunate to have one reviewer advise to place the tabletop facing the floor, and build it up (towards the base and feet) from there. If you are moderately confident you can put together a puzzle, you will be in good shape. Because the directions are just a fairly inaccurate “exploded view”.Biggest thing not shown at all in the drawing is key. I had to disassemble all four of our tables when I discovered on the last one a little notch on one end of one section of the two tubes which butt together with a ring. You need to make sure the notch lines up with a bump that is cast in either the top or bottom plates – I don’t have the tables right here so I can’t tell you which end for sure – just look carefully for it, or your table will be crooked and wobbly no matter how tightly you cinch it down. Line it up and it solid.The same person who gave the helpful idea of working the table upside down also mentioned to “keep the bolt inside the locking assembly”. I think that bolt actually gets thrown away; it is just a way to transport the table assembly safely.Also, use a real wrench or socket: the supplied “wrench” barely allows for you to get the torque needed to give you a stable table. And will give you scraped knuckles in the process. I am getting the skin back after a week, myself.The other point to be made is that you will have several washers left over. Just make sure the lock-washer is always nearest the nut, then the flat washer, then the part it is attaching to.The last bit of advice was something I mostly lucked out on, but there is a delicate balance between how far to put the rod in either end. My advice is to check to make sure it comes exactly to the end of the nut on the inside of the locking mechanism. If it goes a couple threads beyond that, it will not close properly. Too short and other problems advance.Definitely though, this seemed like a very good table for the price! I guess the low price did not allow them to hire a good instruction writer.
Beware assembly! There are issues. Very sturdy in the end, and looks nice and solid, with fairly substantial construction. We are not talking highquality here – just solid enough and good-looking enough to be out for art gallery opening receptions: so that’s pretty good I would say.But every buyer should take note about a few things in assembly. I was fortunate to have one reviewer advise to place the tabletop facing the floor, and build it up (towards the base and feet) from there. If you are moderately confident you can put together a puzzle, you will be in good shape. Because the directions are just a fairly inaccurate “exploded view”.Biggest thing not shown at all in the drawing is key. I had to disassemble all four of our tables when I discovered on the last one a little notch on one end of one section of the two tubes which butt together with a ring. You need to make sure the notch lines up with a bump that is cast in either the top or bottom plates – I don’t have the tables right here so I can’t tell you which end for sure – just look carefully for it, or your table will be crooked and wobbly no matter how tightly you cinch it down. Line it up and it solid.The same person who gave the helpful idea of working the table upside down also mentioned to “keep the bolt inside the locking assembly”. I think that bolt actually gets thrown away; it is just a way to transport the table assembly safely.Also, use a real wrench or socket: the supplied “wrench” barely allows for you to get the torque needed to give you a stable table. And will give you scraped knuckles in the process. I am getting the skin back after a week, myself.The other point to be made is that you will have several washers left over. Just make sure the lock-washer is always nearest the nut, then the flat washer, then the part it is attaching to.The last bit of advice was something I mostly lucked out on, but there is a delicate balance between how far to put the rod in either end. My advice is to check to make sure it comes exactly to the end of the nut on the inside of the locking mechanism. If it goes a couple threads beyond that, it will not close properly. Too short and other problems advance.Definitely though, this seemed like a very good table for the price! I guess the low price did not allow them to hire a good instruction writer.
Beware assembly! There are issues. Very sturdy in the end, and looks nice and solid, with fairly substantial construction. We are not talking highquality here – just solid enough and good-looking enough to be out for art gallery opening receptions: so that’s pretty good I would say.But every buyer should take note about a few things in assembly. I was fortunate to have one reviewer advise to place the tabletop facing the floor, and build it up (towards the base and feet) from there. If you are moderately confident you can put together a puzzle, you will be in good shape. Because the directions are just a fairly inaccurate “exploded view”.Biggest thing not shown at all in the drawing is key. I had to disassemble all four of our tables when I discovered on the last one a little notch on one end of one section of the two tubes which butt together with a ring. You need to make sure the notch lines up with a bump that is cast in either the top or bottom plates – I don’t have the tables right here so I can’t tell you which end for sure – just look carefully for it, or your table will be crooked and wobbly no matter how tightly you cinch it down. Line it up and it solid.The same person who gave the helpful idea of working the table upside down also mentioned to “keep the bolt inside the locking assembly”. I think that bolt actually gets thrown away; it is just a way to transport the table assembly safely.Also, use a real wrench or socket: the supplied “wrench” barely allows for you to get the torque needed to give you a stable table. And will give you scraped knuckles in the process. I am getting the skin back after a week, myself.The other point to be made is that you will have several washers left over. Just make sure the lock-washer is always nearest the nut, then the flat washer, then the part it is attaching to.The last bit of advice was something I mostly lucked out on, but there is a delicate balance between how far to put the rod in either end. My advice is to check to make sure it comes exactly to the end of the nut on the inside of the locking mechanism. If it goes a couple threads beyond that, it will not close properly. Too short and other problems advance.Definitely though, this seemed like a very good table for the price! I guess the low price did not allow them to hire a good instruction writer.
Beware assembly! There are issues. Very sturdy in the end, and looks nice and solid, with fairly substantial construction. We are not talking highquality here – just solid enough and good-looking enough to be out for art gallery opening receptions: so that’s pretty good I would say.But every buyer should take note about a few things in assembly. I was fortunate to have one reviewer advise to place the tabletop facing the floor, and build it up (towards the base and feet) from there. If you are moderately confident you can put together a puzzle, you will be in good shape. Because the directions are just a fairly inaccurate “exploded view”.Biggest thing not shown at all in the drawing is key. I had to disassemble all four of our tables when I discovered on the last one a little notch on one end of one section of the two tubes which butt together with a ring. You need to make sure the notch lines up with a bump that is cast in either the top or bottom plates – I don’t have the tables right here so I can’t tell you which end for sure – just look carefully for it, or your table will be crooked and wobbly no matter how tightly you cinch it down. Line it up and it solid.The same person who gave the helpful idea of working the table upside down also mentioned to “keep the bolt inside the locking assembly”. I think that bolt actually gets thrown away; it is just a way to transport the table assembly safely.Also, use a real wrench or socket: the supplied “wrench” barely allows for you to get the torque needed to give you a stable table. And will give you scraped knuckles in the process. I am getting the skin back after a week, myself.The other point to be made is that you will have several washers left over. Just make sure the lock-washer is always nearest the nut, then the flat washer, then the part it is attaching to.The last bit of advice was something I mostly lucked out on, but there is a delicate balance between how far to put the rod in either end. My advice is to check to make sure it comes exactly to the end of the nut on the inside of the locking mechanism. If it goes a couple threads beyond that, it will not close properly. Too short and other problems advance.Definitely though, this seemed like a very good table for the price! I guess the low price did not allow them to hire a good instruction writer.
I love the aesthetics of the table, very tall as I was desiring it to be!! It is sturdy once you twist as the parts securely. The circumference of the table top is larger than expected and very much needed. Only concern is the lack of thorough instructions, don’t worry you can find a detail video on youtube to assist. Just type in the name of the product order and you are set!Overall I would recommend this product!
I love the aesthetics of the table, very tall as I was desiring it to be!! It is sturdy once you twist as the parts securely. The circumference of the table top is larger than expected and very much needed. Only concern is the lack of thorough instructions, don’t worry you can find a detail video on youtube to assist. Just type in the name of the product order and you are set!Overall I would recommend this product!
I love the aesthetics of the table, very tall as I was desiring it to be!! It is sturdy once you twist as the parts securely. The circumference of the table top is larger than expected and very much needed. Only concern is the lack of thorough instructions, don’t worry you can find a detail video on youtube to assist. Just type in the name of the product order and you are set!Overall I would recommend this product!
I provide instructions. These tables are not “perfect” – but they don’t cost $100 either. Their shortcoming of manufacturing, and their assembly instruction shortcomings are easily corrected.I have posted a picture of my thoughts on assembly to this review.As a lifetime builder and career engineer, I found these tables to be fully acceptable.Yes – the “directions” are VERY poor. There are alignment notches/bumps which must be aligned and are not clearly shown. And parts of the drawing are simply wrong. You might want to try my instructions in my picture below – print them as a letter-sized picture. I hope that anyone using them finds my recommended assembly and fix very helpful.In regard to some other negative review comments :There IS a manufacturing shortfall with the part K tilting mechanism – but it is easily fixed with a bit of attention and a flat file. See my instructions.While I agree that the fit quality of the threads is not good – I did not have a stripping problem.The person with a table “getting more wobbly” and the one with the crooked tables probably did not line up the notches/bumps of the K-D-B parts – the fault of very poor instructions. You might try to disassemble and reassemble.The “too short part C rod” person probably threaded the C rod too far into part K – this is again the fault of the poor instructions. I discovered the flaw and had to partially disassemble to correct it. See my solution in my instructions about C to K assembly.Also : Start with the fact that the table IS the size it says it is, don’t buy it then expect something else. If you don’t want a table that tips, then don’t buy one – or just don’t tip it – but don’t expect that you can throw some part(s) away and still have it work.Printing the attached picture is probably best, but my suggested assembly is as follows :Flash Furniture 2-Foot Round Aluminum Indoor-Outdoor Folding Bar Height Table with BaseThese instructions use the original “names” as of June 2020, including the top as part “B” *NOTE : Before assembly, anyone who has some mechanical skills should verify that part K’s latch mechanism works easily every time. Both of my tables needed a little flat-filing to remove casting bumps, and to assure a flat surface on the hook of the latch. With a little filing I found that the latching mechanism would reliably move fully into place, securing the table. Save the bolt – it attaches K to A.General instruction : I recommend that you use a little bit of grease on every thread, especially the feet. This will ease assembly, and will make disassembly or tightening possible later.By far, the easiest way to assemble this table is upside down.Place A upside-down on a soft surface. The picture with K is WRONG (the manufacturer should fix this, and probably rename the parts at the same time *) – You must align parts K and A’s bumps and notch !! This will be at 45 degrees, not in line with the top’s arms as is shown. Attach K to A using the bolt which was inside K.Dispose of both plastic thread protectors from the C rod with threads on both ends. Then, after spinning an F nut fully onto either end of this rod, thread and tighten this same end tight into the coupler of the other C rod. Then tighten jam-nut F against the coupler.On either end of your now-long C rod, thread an F nut down, but not all the way : leave about 3/8″ plus of unused threads. Put on the lock washer L and the flat washer G, then thread the long C rod into K. When the washers and nut touch K, tighten the nut.Now slide the shorter part D tube over the rod, then the coupler part E, then the longer part D – BUT ! You must make sure that the end with the notch will be up – towards where the legs go.Remove and dispose of the shipping bolt holding the weight J to the legs. Assemble legs B onto the rod/tubes of C and D. Note the bump on part B legs – this MUST line up with the notch on part D. Here you have a choice – the tube with the notch can be rotated – this means you can align the legs with any part of the top you like. If you are assembling only one table, I recommend that you align the base-legs and “top-legs” – this will allow a folded table to sit as close to a wall as possible. But if you are assembling many tables, and will need to store them, then you might want to assemble half with the base-legs and “top-legs” in alignment, and half of them at 45 degrees. This will allow for more compact storage with table tops folded.Reinsert the weight into the legs, Install G then L then thread one F down and tighten ( This will be easier if you have a 17mm (or 11/16″) socket wrench ). Thread on the other F and tighten.Thread in the four feet. Turn your table over and enjoy !* The manufacturer probably should rename the parts so that their assembly falls into alphabetic order. A=A, B to I, C=C, D to H, E to G, F to D, G to F, H to L, I to K, J=J, K to B, L to E.( The manufacturer should add one flat piece of protective cardboard on the table top side when packing.
I provide instructions. These tables are not “perfect” – but they don’t cost $100 either. Their shortcoming of manufacturing, and their assembly instruction shortcomings are easily corrected.I have posted a picture of my thoughts on assembly to this review.As a lifetime builder and career engineer, I found these tables to be fully acceptable.Yes – the “directions” are VERY poor. There are alignment notches/bumps which must be aligned and are not clearly shown. And parts of the drawing are simply wrong. You might want to try my instructions in my picture below – print them as a letter-sized picture. I hope that anyone using them finds my recommended assembly and fix very helpful.In regard to some other negative review comments :There IS a manufacturing shortfall with the part K tilting mechanism – but it is easily fixed with a bit of attention and a flat file. See my instructions.While I agree that the fit quality of the threads is not good – I did not have a stripping problem.The person with a table “getting more wobbly” and the one with the crooked tables probably did not line up the notches/bumps of the K-D-B parts – the fault of very poor instructions. You might try to disassemble and reassemble.The “too short part C rod” person probably threaded the C rod too far into part K – this is again the fault of the poor instructions. I discovered the flaw and had to partially disassemble to correct it. See my solution in my instructions about C to K assembly.Also : Start with the fact that the table IS the size it says it is, don’t buy it then expect something else. If you don’t want a table that tips, then don’t buy one – or just don’t tip it – but don’t expect that you can throw some part(s) away and still have it work.Printing the attached picture is probably best, but my suggested assembly is as follows :Flash Furniture 2-Foot Round Aluminum Indoor-Outdoor Folding Bar Height Table with BaseThese instructions use the original “names” as of June 2020, including the top as part “B” *NOTE : Before assembly, anyone who has some mechanical skills should verify that part K’s latch mechanism works easily every time. Both of my tables needed a little flat-filing to remove casting bumps, and to assure a flat surface on the hook of the latch. With a little filing I found that the latching mechanism would reliably move fully into place, securing the table. Save the bolt – it attaches K to A.General instruction : I recommend that you use a little bit of grease on every thread, especially the feet. This will ease assembly, and will make disassembly or tightening possible later.By far, the easiest way to assemble this table is upside down.Place A upside-down on a soft surface. The picture with K is WRONG (the manufacturer should fix this, and probably rename the parts at the same time *) – You must align parts K and A’s bumps and notch !! This will be at 45 degrees, not in line with the top’s arms as is shown. Attach K to A using the bolt which was inside K.Dispose of both plastic thread protectors from the C rod with threads on both ends. Then, after spinning an F nut fully onto either end of this rod, thread and tighten this same end tight into the coupler of the other C rod. Then tighten jam-nut F against the coupler.On either end of your now-long C rod, thread an F nut down, but not all the way : leave about 3/8″ plus of unused threads. Put on the lock washer L and the flat washer G, then thread the long C rod into K. When the washers and nut touch K, tighten the nut.Now slide the shorter part D tube over the rod, then the coupler part E, then the longer part D – BUT ! You must make sure that the end with the notch will be up – towards where the legs go.Remove and dispose of the shipping bolt holding the weight J to the legs. Assemble legs B onto the rod/tubes of C and D. Note the bump on part B legs – this MUST line up with the notch on part D. Here you have a choice – the tube with the notch can be rotated – this means you can align the legs with any part of the top you like. If you are assembling only one table, I recommend that you align the base-legs and “top-legs” – this will allow a folded table to sit as close to a wall as possible. But if you are assembling many tables, and will need to store them, then you might want to assemble half with the base-legs and “top-legs” in alignment, and half of them at 45 degrees. This will allow for more compact storage with table tops folded.Reinsert the weight into the legs, Install G then L then thread one F down and tighten ( This will be easier if you have a 17mm (or 11/16″) socket wrench ). Thread on the other F and tighten.Thread in the four feet. Turn your table over and enjoy !* The manufacturer probably should rename the parts so that their assembly falls into alphabetic order. A=A, B to I, C=C, D to H, E to G, F to D, G to F, H to L, I to K, J=J, K to B, L to E.( The manufacturer should add one flat piece of protective cardboard on the table top side when packing.
I provide instructions. These tables are not “perfect” – but they don’t cost $100 either. Their shortcoming of manufacturing, and their assembly instruction shortcomings are easily corrected.I have posted a picture of my thoughts on assembly to this review.As a lifetime builder and career engineer, I found these tables to be fully acceptable.Yes – the “directions” are VERY poor. There are alignment notches/bumps which must be aligned and are not clearly shown. And parts of the drawing are simply wrong. You might want to try my instructions in my picture below – print them as a letter-sized picture. I hope that anyone using them finds my recommended assembly and fix very helpful.In regard to some other negative review comments :There IS a manufacturing shortfall with the part K tilting mechanism – but it is easily fixed with a bit of attention and a flat file. See my instructions.While I agree that the fit quality of the threads is not good – I did not have a stripping problem.The person with a table “getting more wobbly” and the one with the crooked tables probably did not line up the notches/bumps of the K-D-B parts – the fault of very poor instructions. You might try to disassemble and reassemble.The “too short part C rod” person probably threaded the C rod too far into part K – this is again the fault of the poor instructions. I discovered the flaw and had to partially disassemble to correct it. See my solution in my instructions about C to K assembly.Also : Start with the fact that the table IS the size it says it is, don’t buy it then expect something else. If you don’t want a table that tips, then don’t buy one – or just don’t tip it – but don’t expect that you can throw some part(s) away and still have it work.Printing the attached picture is probably best, but my suggested assembly is as follows :Flash Furniture 2-Foot Round Aluminum Indoor-Outdoor Folding Bar Height Table with BaseThese instructions use the original “names” as of June 2020, including the top as part “B” *NOTE : Before assembly, anyone who has some mechanical skills should verify that part K’s latch mechanism works easily every time. Both of my tables needed a little flat-filing to remove casting bumps, and to assure a flat surface on the hook of the latch. With a little filing I found that the latching mechanism would reliably move fully into place, securing the table. Save the bolt – it attaches K to A.General instruction : I recommend that you use a little bit of grease on every thread, especially the feet. This will ease assembly, and will make disassembly or tightening possible later.By far, the easiest way to assemble this table is upside down.Place A upside-down on a soft surface. The picture with K is WRONG (the manufacturer should fix this, and probably rename the parts at the same time *) – You must align parts K and A’s bumps and notch !! This will be at 45 degrees, not in line with the top’s arms as is shown. Attach K to A using the bolt which was inside K.Dispose of both plastic thread protectors from the C rod with threads on both ends. Then, after spinning an F nut fully onto either end of this rod, thread and tighten this same end tight into the coupler of the other C rod. Then tighten jam-nut F against the coupler.On either end of your now-long C rod, thread an F nut down, but not all the way : leave about 3/8″ plus of unused threads. Put on the lock washer L and the flat washer G, then thread the long C rod into K. When the washers and nut touch K, tighten the nut.Now slide the shorter part D tube over the rod, then the coupler part E, then the longer part D – BUT ! You must make sure that the end with the notch will be up – towards where the legs go.Remove and dispose of the shipping bolt holding the weight J to the legs. Assemble legs B onto the rod/tubes of C and D. Note the bump on part B legs – this MUST line up with the notch on part D. Here you have a choice – the tube with the notch can be rotated – this means you can align the legs with any part of the top you like. If you are assembling only one table, I recommend that you align the base-legs and “top-legs” – this will allow a folded table to sit as close to a wall as possible.But if you are assembling many tables, and will need to store them, then you might want to assemble half with the base-legs and “top-legs” in alignment, and half of them at 45 degrees. This will allow for more compact storage with table tops folded.Reinsert the weight into the legs, Install G then L then thread one F down and tighten ( This will be easier if you have a 17mm (or 11/16″) socket wrench ). Thread on the other F and tighten.Thread in the four feet. Turn your table over and enjoy !* The manufacturer probably should rename the parts so that their assembly falls into alphabetic order.A=A, B to I, C=C, D to H, E to G, F to D, G to F, H to L, I to K, J=J, K to B, L to E.( The manufacturer should add one flat piece of protective cardboard on the table top side when packing.
ATTENTION: Full installation instructions with photos. ATTENTION: Full installation instructions – combining two sets of most valuable assembly instructions here with added detailsI bought this table because it was taller than most at 45 inches. It is perfect to stand beside my above ground pool and hold drinks, a speaker, books, hats, etc. I love the table itself and decided to roll the dice on assembly since it was the best fit and price point for my needs. I am glad I did.But everyone who said the instructions are a nightmare… they’re right. So, thank you Ivanhoe jevre and Bill. I could not have put this thing together without you both! I am combining some parts of each of your instructions here with more details to maybe help others.I am only giving the table 4 stars because as many before me, the tabletop hinge will not stay closed. It looks like I will be using the zip-tie workaround.Observations from unpacking the parts:1) The table base weight (J), shipped inside of the base (B) itself, and was secured by a long screw for shipping purposes. This 1” long screw was not needed for assembly and also was not on the parts list. Set it aside for now. See first photo.2) There are two narrow steel rods (C) in the package. One of mine came with black plastic pieces on either end for shipping purposes and were not needed for assembly and also were not on the parts list. Set them aside for now. See first photo.3) The large folding hinge (K) for securing the tabletop (A) to the base had a screw (approx. 1/3”) inside of it. This screw IS needed for assembly and also is NOT in the parts list.Reviewing the instructions and inventorying the parts:1) I could not find the table base weight (J) at first because it was shipped attached to the base (B) itself.2) The steel rods (Cx2) were very confusing to me. They are two different lengths but are not clearly differentiated in the instructions. While I will mention this in the assembly instructions below, the shorter steel rod attaches to the tabletop (A) versus the base. Together, they are meant to be perpendicular to the ground (they run from the tabletop (A) to the table base inside the three aluminum tubes (Dx2, E).3) The two aluminum tubes (D) are also different lengths. Same thing, the shorter length tube goes at the top directly under the tabletop (A).Assembly:1) Bill is spot on, start at the top and work your way down for assembly.Starting with tabletop (A), affix the large hinge (K) using the screw (approx.. 1/3” long) that is not on the parts list and that may have been shipped inside of K. Tighten with the enclosed wrench (H). It does not require any washers. Completely close the hinge for now.2) Next place a nut (F), then a split washer (L), and finally a flat washer (G) on the threaded end of the shorter steel rod (C). Move them down almost an inch from the end of the rod. NOTE: the order of the hardware will be folding hinge (K) > flat washer (G) > split washer (L) > nut (F) you must use this order.3) Take the shorter steel rod (C) and screw it into the underside of the large tabletop hinge (K). Once you bump into the nut (F), hold the steel rod and using the enclosed wrench (H) tighten the nut to the flat washer (G) that is already on the steel rod.NOTE: Open the tabletop hinge (K) and make sure that the threaded end of the steel rod (C) is at least flush or protruding just a bit through the hinge. See photos 2 and 3. If there is more than that, the assembled rods will not be long enough to secure the base (B) and base weight (J).4) Take the longer steel rod (C) and add a nut (F) to one end. Then take that end and screw it into the other steel rod that is already attached to the tabletop. For now, you can tighten a bit with the wrench (H) but you may need to shorten or lengthen later.5) Slide the shorter steel tube (D), over the steel rods so that it is in the grove on the tabletop hinge (K). Slide (E) into place next and finally, the longer steel tube (D) that has the small notch in the aluminum at the bottom. This will lock into the base to prevent the tabletop from turning at the bottom.6) Place the base (B) then the base weight (J) over the end of the steel rod that is sticking out of the assembled aluminum tubes. Ensure that the notch in the aluminum tube lines up with the correct ridge on the base, this will prevent spinning.NOTE: You want at least ¾” to 1” of steel rod available through the base of the weight. If you need more length, you will need to either loosen the steel rods (C) connection to each other, or at the tabletop hinge (K).If you have enough length, remove the base weight, base, and aluminum tubes to tighten the nut (F) that is holding the two steel rods (C) together. Reassemble (step 6)7) Add the flat washer (G) > split washer (L) > nuts (F*2) you must use this order. Tighten using a 11/16 socket wrench.8) Add the four adjustable feet (I).That should be it. Good luck!!
Arrived very poorly packed with several small dents in the rim of the table top. The column is marked/stained and will need polishing before use. Assembly was fairly straightforward for anyone used to IKEA type products, but with many more parts than would be expected – the central column alone for instance consists of 5 main parts plus nuts, washers and bolts, plus the hinge at the top. Care must be taken to align a small ridge on the top and bottom of the column fixings so that the top tips at a safe angle i.e. aligned to a leg of the base to prevent tipping. This isn’t clear in the small illustrations enclosed. A small and ill-fitting spanner is supplied. Stupidly, I tried to use it and skinned my knuckles before retreating to my tool box and getting a proper spanner to use. I doubt very much if the spanner supplied could safely be used to tighten the nuts adequately. The hinge is poorly cast with flimsy springs on the catch. The base is not solid but a pressing with a small cast iron or steel star inside to provide weight in the centre. Once assembled the table has a cheap, functional appearance and is just about stable, but does not feel solid, nor does it look nice enough (in my view) for use inside a house. I consider this table to be over-priced and poorly made. I hope this review is helpful.
Super fácil de armar, practica y no se tambalea, está súper y quedó super en mi bar, simplemente hermosa
Super fácil de armar, practica y no se tambalea, está súper y quedó super en mi bar, simplemente hermosa
Super fácil de armar, practica y no se tambalea, está súper y quedó super en mi bar, simplemente hermosa
Table is nice and well built
Phenomenal value and easy to assemble. I normally don’t write reviews but feel I have to when I see unjustified negative reviews for what I think is an outstand product and value. I assembled this in less than 10 minutes only having to take a quick glance at what I feel were very clear directions. I literally probably spent less time putting this table together than others posting the process they went through. For the price I don’t think you will find a better value on Amazon or anywhere else for that matter. As you can see by the photo it looks fantastic and is extremely sturdy. Unbelievable at well under $100.00. I do up to a dozen tradeshows a year and the booth furniture gets treated pretty rough by the folks that pack and unpack. I have no doubt this table will hold up much better than the previous inferior tables that ended up in a dumpster. Please, do yourself a favor and disregard all of the negative reviews. This purchase gets my highest rating!
Phenomenal value and easy to assemble. I normally don’t write reviews but feel I have to when I see unjustified negative reviews for what I think is an outstand product and value. I assembled this in less than 10 minutes only having to take a quick glance at what I feel were very clear directions. I literally probably spent less time putting this table together than others posting the process they went through. For the price I don’t think you will find a better value on Amazon or anywhere else for that matter. As you can see by the photo it looks fantastic and is extremely sturdy. Unbelievable at well under $100.00. I do up to a dozen tradeshows a year and the booth furniture gets treated pretty rough by the folks that pack and unpack. I have no doubt this table will hold up much better than the previous inferior tables that ended up in a dumpster. Please, do yourself a favor and disregard all of the negative reviews. This purchase gets my highest rating!
Great but hard to assemble. The directions were awful! But once we figured it out they were great.
Missing Parts- unable to get support on their website link. I almost hate to write bad reviews but I was very disappointed so here we are. I don’t know why I even tried because I read reviews about assembly issues and a few regarding missing parts. But the good reviews about how nice the table is are also in order, so I decided for the price let’s roll the dice. Well you get what you pay for and I Crapped out and received a partial table. Received in original packaging pretty banged up. I already knew go straight in to verify parts and that’s where the issue started. Missing the short rod, washers, nuts, and bolts. And that’s where it ended.Shipping was as expected. The actual table top is perfect size and looks great for what I needed. I’m so upset I have these partial pieces and no table for my bar stools. Also the support link provided is trash and I was unable to reach anyone from the company to resolve the issue or to assist with Missing parts or returns, or refunds. Which is why I needed to write this review. I will update if anything changes..
Maddening. We bought two of these for a holiday cocktail party we hosted at our house Dec 2023, same motivation and hopes like many of you reading this. Be warned: while the quality of the tables themselves is solid enough, the setup instructions are TERRIBLE, and worst of all, if you manage to follow the assembly instructions–and make leaps of faith using your intuition to fill in the blanks–you are still left with an assembled table that will not close properly, thus make it completely unusable.To wit: if you lean on the table or place a heavy object on the side opposite the latch connecting the tabletop to the base, it will collapse/fold downward and whatever is on the table will go flying. Simply put, the machine tooling of the latch is terrible.Unfortunately, once you assemble a table, you’re in for a penny, in for a pound as it’s a big pain to dis-assemble, re-box, and return each table. So you look in desperation (the night before your big party, having already spent an hour trying to follow the cr** instructions), to MacGyver a fix. Miraculously, AMZN reviewer “DIYSC” provides one: “There IS a manufacturing shortfall with the part K tilting mechanism – but it is easily fixed with a bit of attention and a flat file.” Seek out his instructions here if you’ve already made the fatal plunge in buying one of these tables. Otherwise, avoid these like the plague until the manufacturer addresses the “part K tilting mechanism” foul up. I really wanted to love these tables. Instead it took us forever to assemble them and figure out the fix, which included putting a rubber tube inside each latching mechanism to help keep the latch from flying open when even the slightest pressure is applied (see pics). Deserves zero stars, maybe one star with the MacGyver fix.
Maddening. We bought two of these for a holiday cocktail party we hosted at our house Dec 2023, same motivation and hopes like many of you reading this. Be warned: while the quality of the tables themselves is solid enough, the setup instructions are TERRIBLE, and worst of all, if you manage to follow the assembly instructions–and make leaps of faith using your intuition to fill in the blanks–you are still left with an assembled table that will not close properly, thus make it completely unusable.To wit: if you lean on the table or place a heavy object on the side opposite the latch connecting the tabletop to the base, it will collapse/fold downward and whatever is on the table will go flying. Simply put, the machine tooling of the latch is terrible.Unfortunately, once you assemble a table, you’re in for a penny, in for a pound as it’s a big pain to dis-assemble, re-box, and return each table. So you look in desperation (the night before your big party, having already spent an hour trying to follow the cr** instructions), to MacGyver a fix. Miraculously, AMZN reviewer “DIYSC” provides one: “There IS a manufacturing shortfall with the part K tilting mechanism – but it is easily fixed with a bit of attention and a flat file.” Seek out his instructions here if you’ve already made the fatal plunge in buying one of these tables. Otherwise, avoid these like the plague until the manufacturer addresses the “part K tilting mechanism” foul up. I really wanted to love these tables. Instead it took us forever to assemble them and figure out the fix, which included putting a rubber tube inside each latching mechanism to help keep the latch from flying open when even the slightest pressure is applied (see pics). Deserves zero stars, maybe one star with the MacGyver fix.
Maddening. We bought two of these for a holiday cocktail party we hosted at our house Dec 2023, same motivation and hopes like many of you reading this. Be warned: while the quality of the tables themselves is solid enough, the setup instructions are TERRIBLE, and worst of all, if you manage to follow the assembly instructions–and make leaps of faith using your intuition to fill in the blanks–you are still left with an assembled table that will not close properly, thus make it completely unusable.To wit: if you lean on the table or place a heavy object on the side opposite the latch connecting the tabletop to the base, it will collapse/fold downward and whatever is on the table will go flying. Simply put, the machine tooling of the latch is terrible.Unfortunately, once you assemble a table, you’re in for a penny, in for a pound as it’s a big pain to dis-assemble, re-box, and return each table. So you look in desperation (the night before your big party, having already spent an hour trying to follow the cr** instructions), to MacGyver a fix. Miraculously, AMZN reviewer “DIYSC” provides one: “There IS a manufacturing shortfall with the part K tilting mechanism – but it is easily fixed with a bit of attention and a flat file.” Seek out his instructions here if you’ve already made the fatal plunge in buying one of these tables. Otherwise, avoid these like the plague until the manufacturer addresses the “part K tilting mechanism” foul up. I really wanted to love these tables. Instead it took us forever to assemble them and figure out the fix, which included putting a rubber tube inside each latching mechanism to help keep the latch from flying open when even the slightest pressure is applied (see pics). Deserves zero stars, maybe one star with the MacGyver fix.
Loving this. I have a small kitchen with limited floor space. Previously, I had a corner table with bench chairs, very cool looking, but impractical for my space, so I sold that, bought a shelving unit and curtains, will review those as well), to store my items that were previously sitting under and on top of my poor corner/bench ensemble. It was a mess. So after I set up the shelving/ curtains, I purchased this to at least have a small table in my small kitchen. And voila, balance to the galaxy was restored. Assembly was pretty easy, just make sure to lay the box in came in on the floor to spread parts out on as you assemble. Table is sturdy, and I’m pleased with the look.
The table arrived well packaged. Easy to assemble. The only issue I had, was, the catch mechanism didn’t work correctly. This mechanism is only on the ‘Foldable Table Top”type. Anyway, I ended-up scewing the table top down, as to stop the dishes ended-up on the floor.
The table arrived well packaged. Easy to assemble. The only issue I had, was, the catch mechanism didn’t work correctly. This mechanism is only on the ‘Foldable Table Top”type. Anyway, I ended-up scewing the table top down, as to stop the dishes ended-up on the floor.
The table arrived well packaged. Easy to assemble. The only issue I had, was, the catch mechanism didn’t work correctly. This mechanism is only on the ‘Foldable Table Top”type. Anyway, I ended-up scewing the table top down, as to stop the dishes ended-up on the floor.
The table arrived well packaged. Easy to assemble. The only issue I had, was, the catch mechanism didn’t work correctly. This mechanism is only on the ‘Foldable Table Top”type. Anyway, I ended-up scewing the table top down, as to stop the dishes ended-up on the floor.
The table arrived well packaged. Easy to assemble. The only issue I had, was, the catch mechanism didn’t work correctly. This mechanism is only on the ‘Foldable Table Top”type. Anyway, I ended-up scewing the table top down, as to stop the dishes ended-up on the floor.
High top tables. Great high top tables! Worked well for a graduation party. They do need assembly, but was pretty easy
Not as described – incorrect height specificaitons and PLASTIC table top. The table was taller than described so it did not work for its intended purpose. Also, the description states metal components; “Round Aluminum” implies the table top is metal. Turns out the top is PLASTIC making it impossible to use with any hot items (will melt the table and put divets in the surface). What a waste of $60. I would return if i could, but I assembled this and threw away the packaging. My bad.
Looks pretty cool. When it’s put together it looks pretty nice, especially the tabletop. The pole in the middle looks a bit weird because it is two separate sections. Putting it together was a little bit confusing. I had to take it apart and try again. Even after putting it together a second time, the part where the pole attaches to the legs at the bottom looks off centered, but I didn’t feel like taking it apart again. My most major complaint is about whatever mechanism they have at the top of the pole under the tabletop. For some reason there is a hinge there. It looks like the hinge is supposed to lock in (there is a button to release), but it never seems to lock for me. This makes leaning on the table quite dangerous. Before I knew that, I was using it as a standing desk outside and leaned on it slightly which caused the tabletop to flip towards me, almost dumping my MacBook on the deck. I now have it turned so that the hinge is on the other side (so would not flip if I leaned on the side towards me), but still don’t lean on it anyway because of that experience. The tabletop itself has a nice pattern/look to it.
Looks pretty cool. When it’s put together it looks pretty nice, especially the tabletop. The pole in the middle looks a bit weird because it is two separate sections. Putting it together was a little bit confusing. I had to take it apart and try again. Even after putting it together a second time, the part where the pole attaches to the legs at the bottom looks off centered, but I didn’t feel like taking it apart again. My most major complaint is about whatever mechanism they have at the top of the pole under the tabletop. For some reason there is a hinge there. It looks like the hinge is supposed to lock in (there is a button to release), but it never seems to lock for me. This makes leaning on the table quite dangerous. Before I knew that, I was using it as a standing desk outside and leaned on it slightly which caused the tabletop to flip towards me, almost dumping my MacBook on the deck. I now have it turned so that the hinge is on the other side (so would not flip if I leaned on the side towards me), but still don’t lean on it anyway because of that experience. The tabletop itself has a nice pattern/look to it.
Fácil armado
Fácil armado
Fácil armado
Fácil armado
Fácil armado
Taller than standard bar height. The table is 45” exactly, which they depict. If you look up bar height, you’ll get 41-46”, putting this at the taller end. There are lots of reviews about the latch not holding well, which is true, but I’m not convinced it will matter, since this table is too high to really lean on at all. It’s more of a display table or if you want to set your drink up high to the side. Nothing you’re going to comfortably stand around with others with your drinks and a small plate. Other than the latch, it feels pretty sturdy, I’m not worried about it blowing over in the wind if I have an outside event. The height and smaller table surface also means normal table cloths don’t fit properly, so maybe I’ll go with the sleek metal look.Update: I reassembled it without the latch that everyone complains about. It feels sturdier and is 1.5” shorter. The fitted table cloths you’ll see advertised with it still don’t fit, but it’s also sleek enough on it own, so you don’t have to cover it up like you might folding tables. I’m keeping it!
Great value. Great product. Very solitary construction. Packaging was beyond great. Every bit of table was protected. Great addition to my patio!!